Cummins 4BT & Diesel Conversions Forums banner

1973 Ford Crewcab Long bed 4x4 12v Cummins Build

2 reading
49K views 74 replies 20 participants last post by  Jcarrick  
#1 ·
I have this project posted up on a few sites, but i figured it would be good to get it going here. There seems to be a lot of knowledgable people here who have great input!

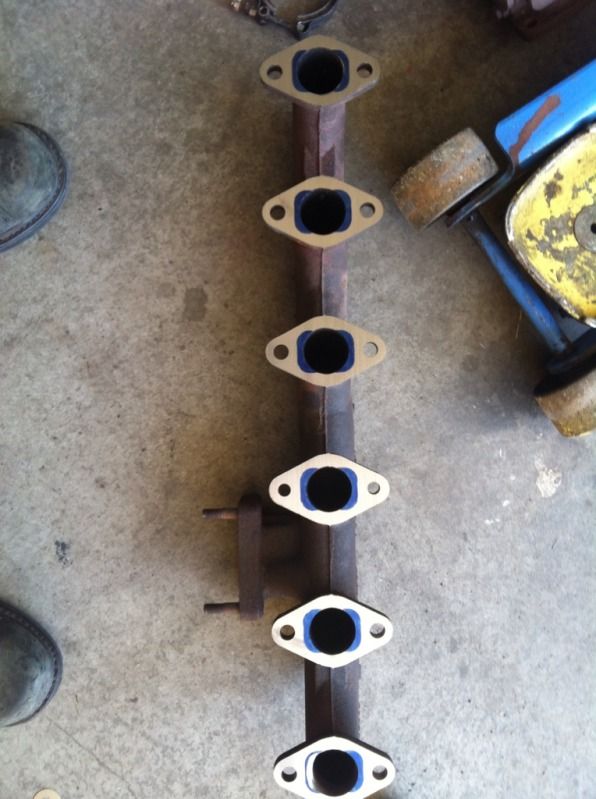
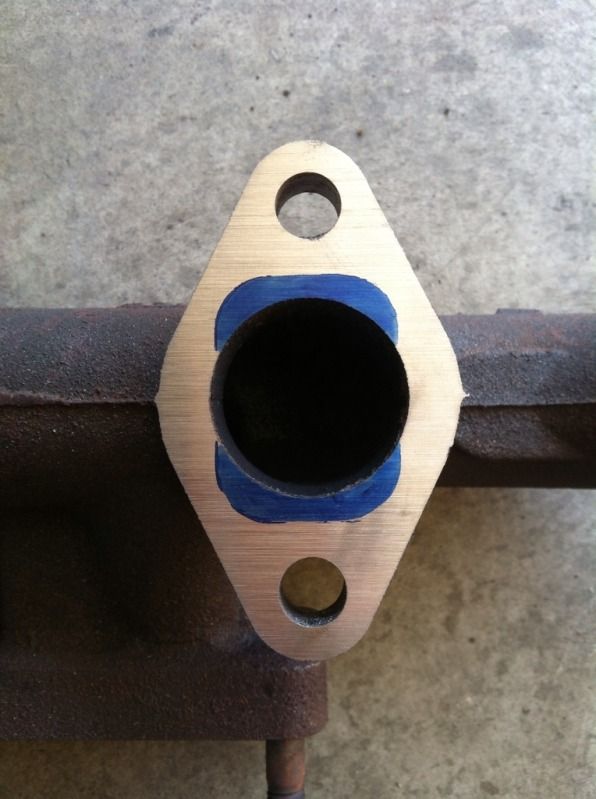
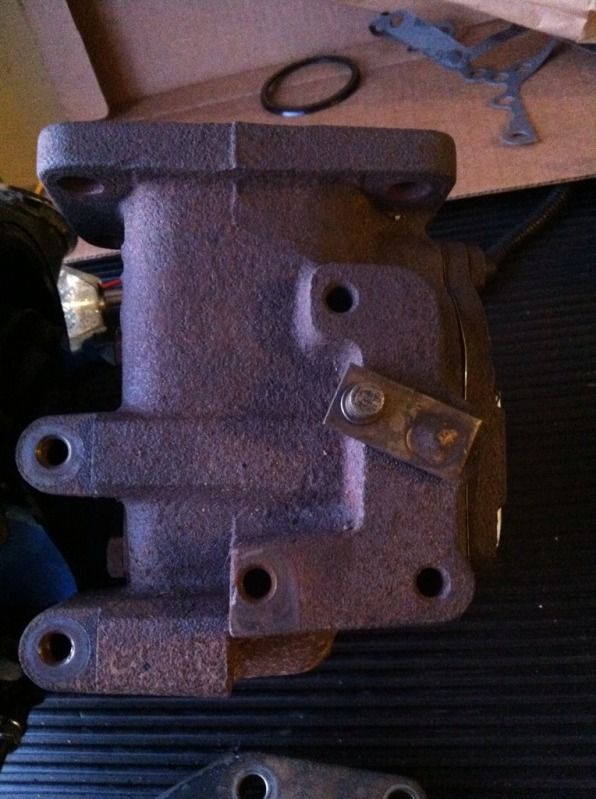
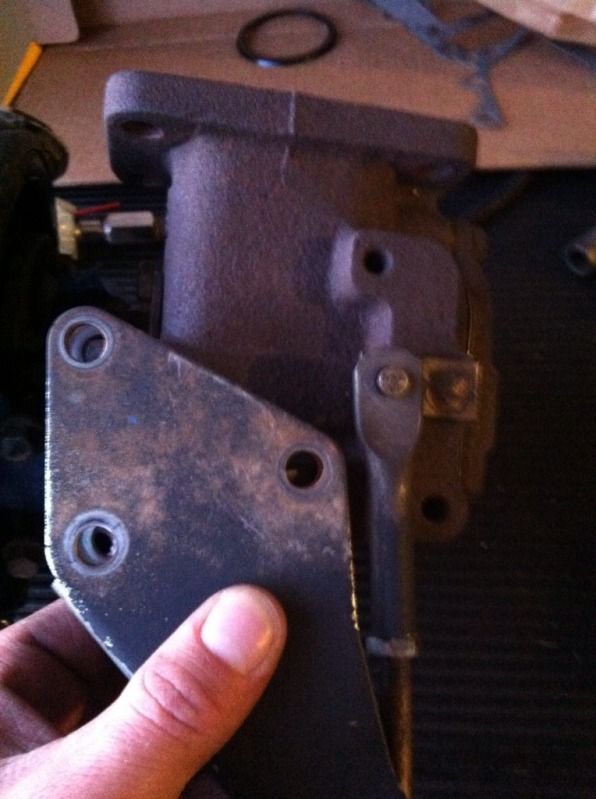
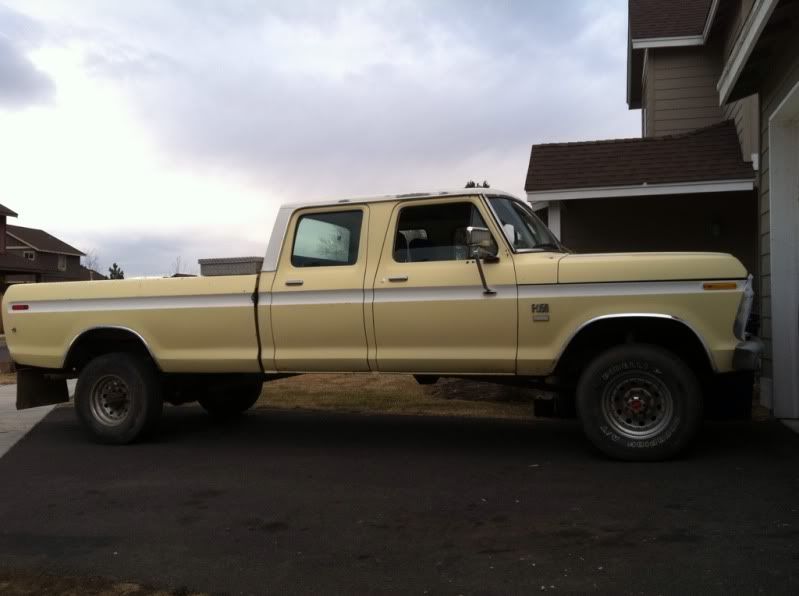
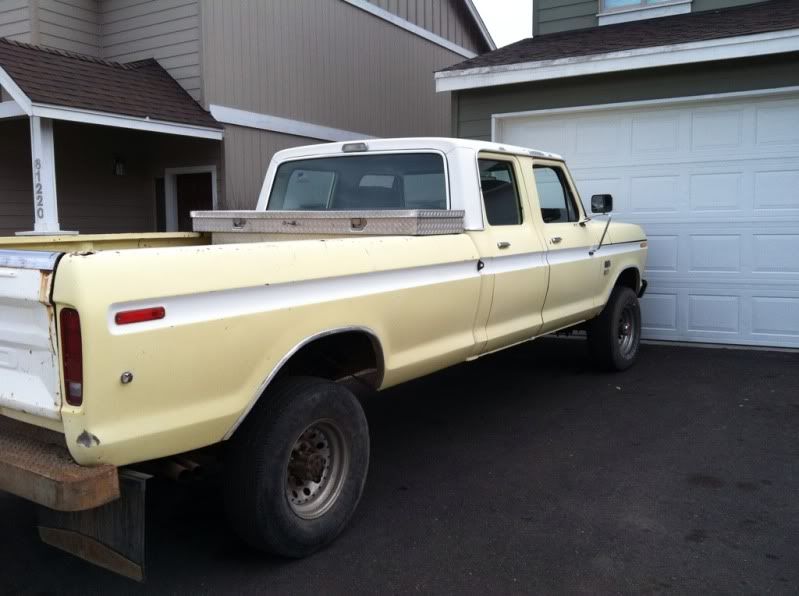
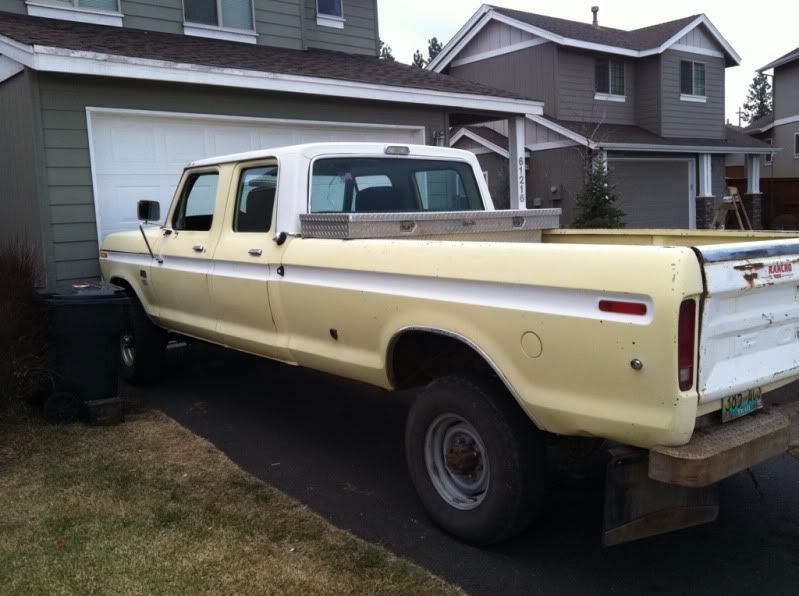
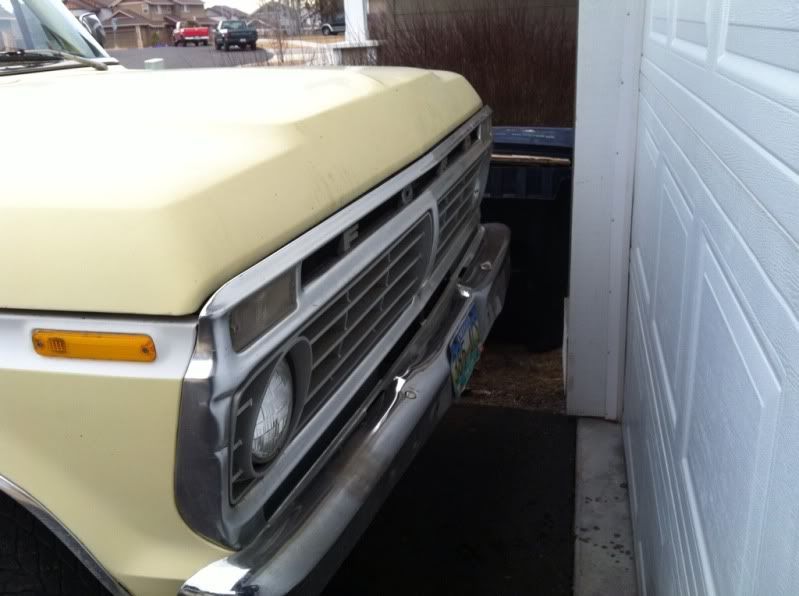
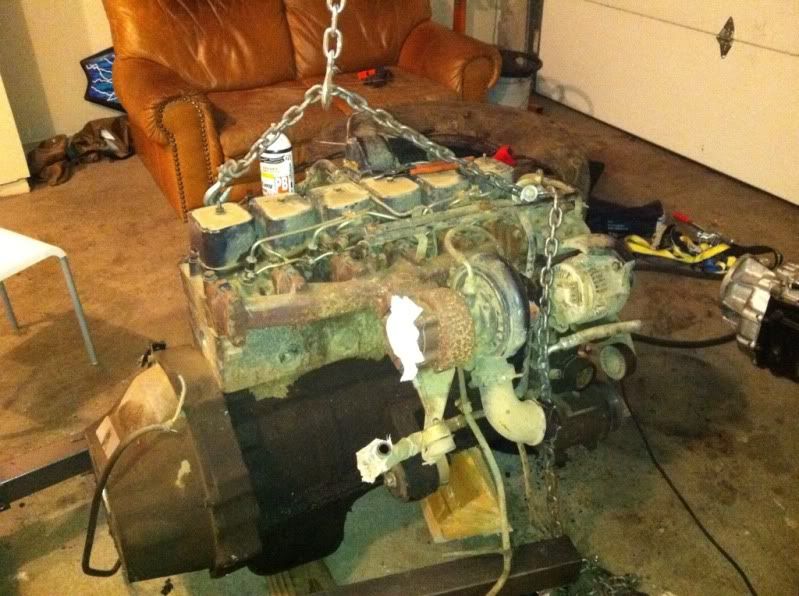
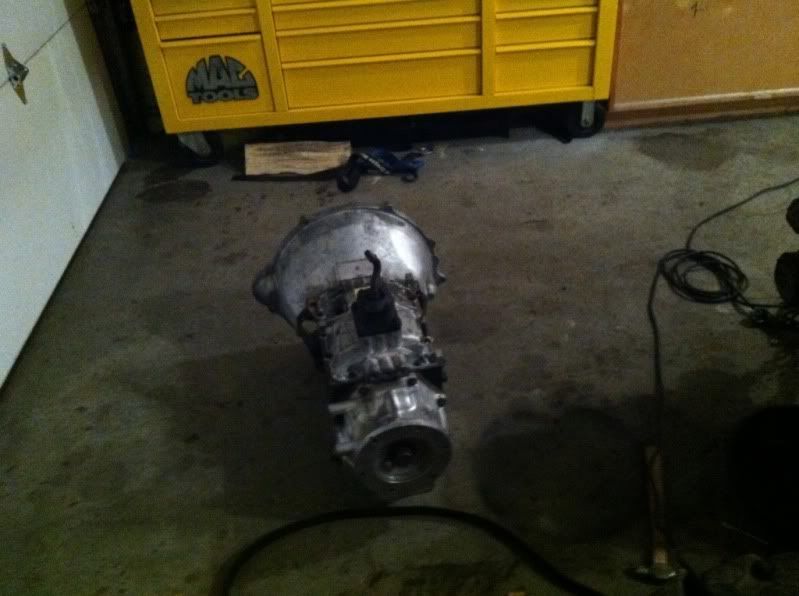
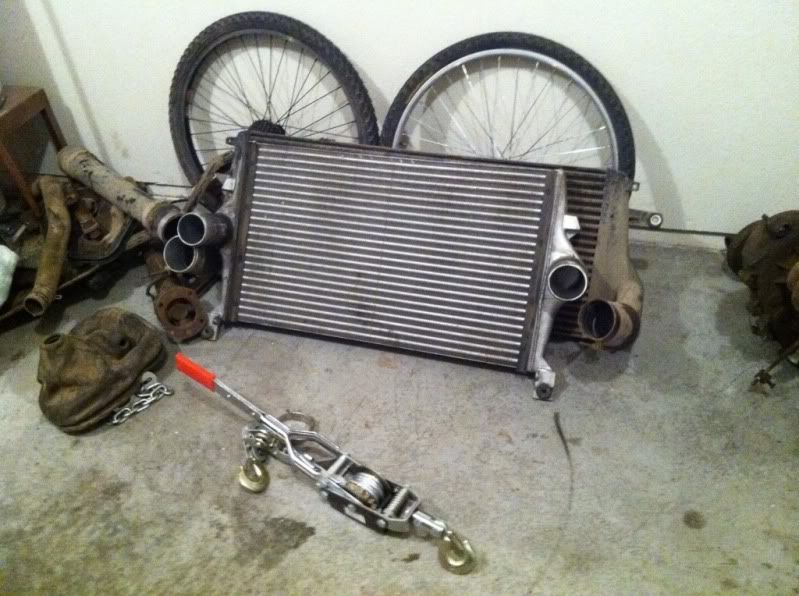
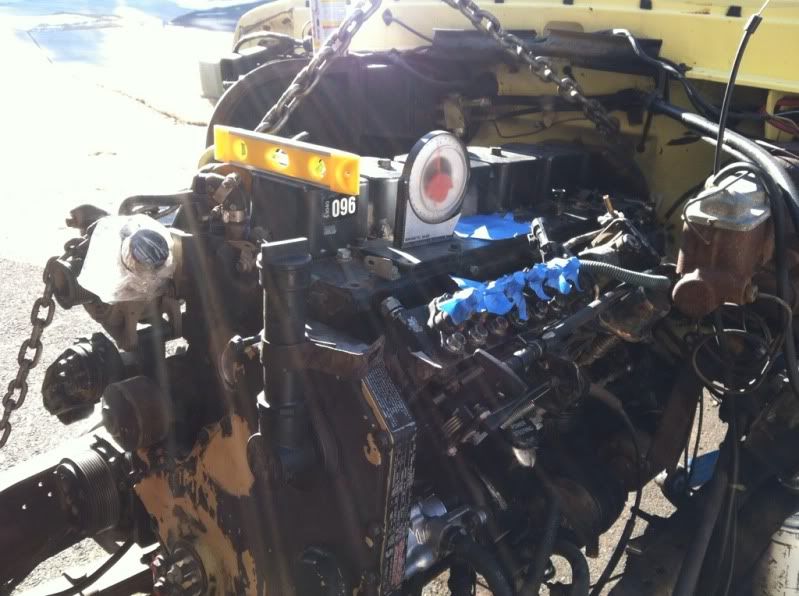
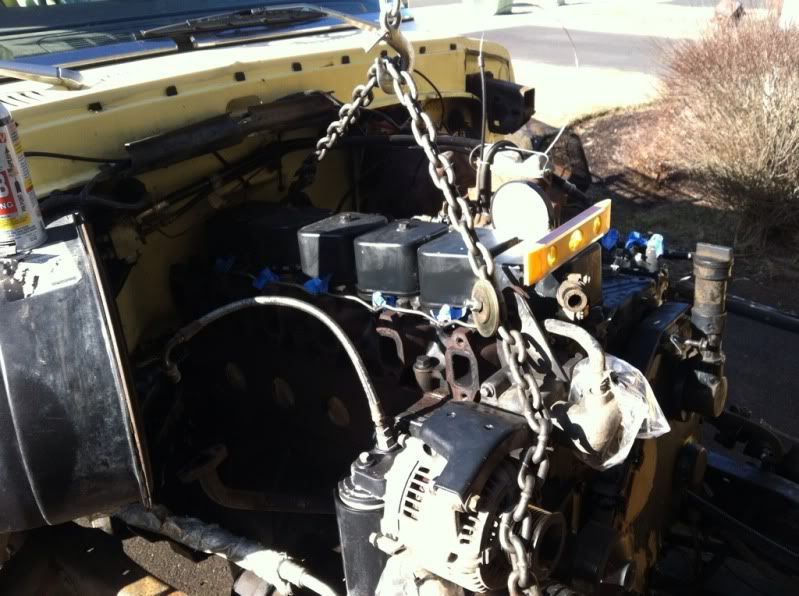
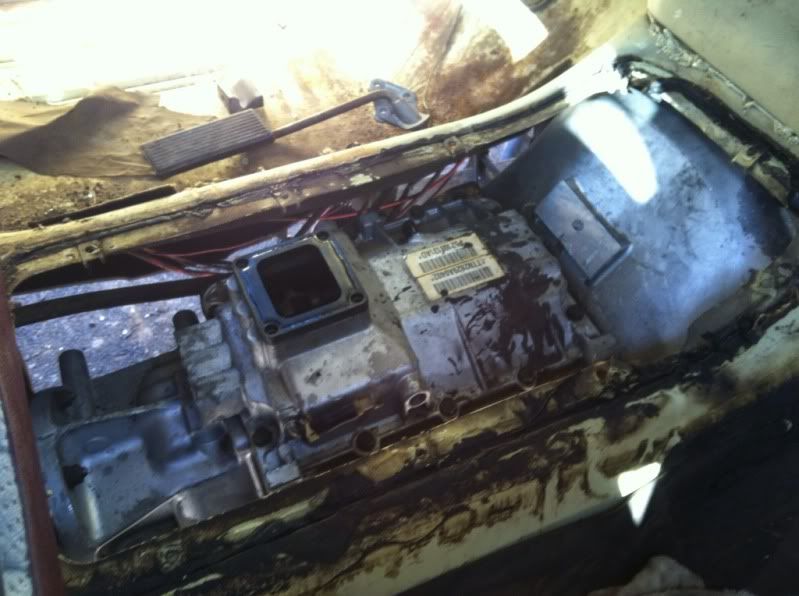
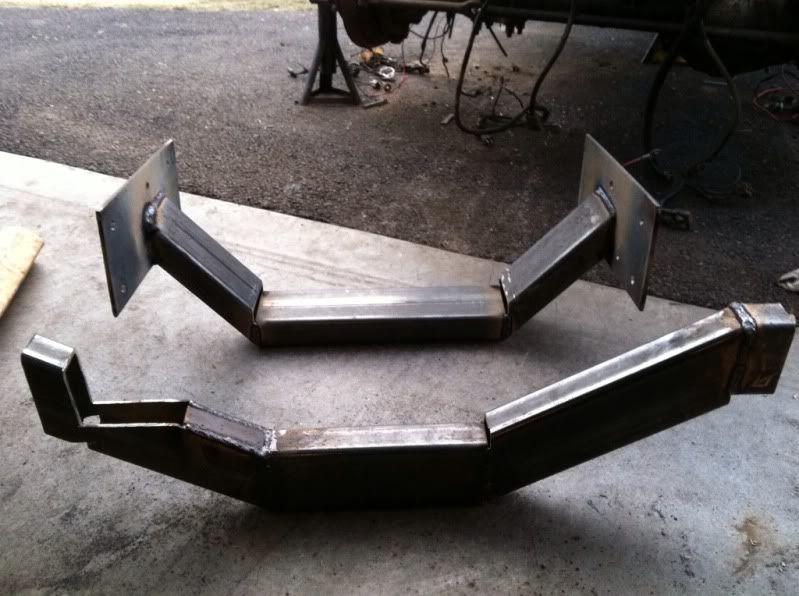
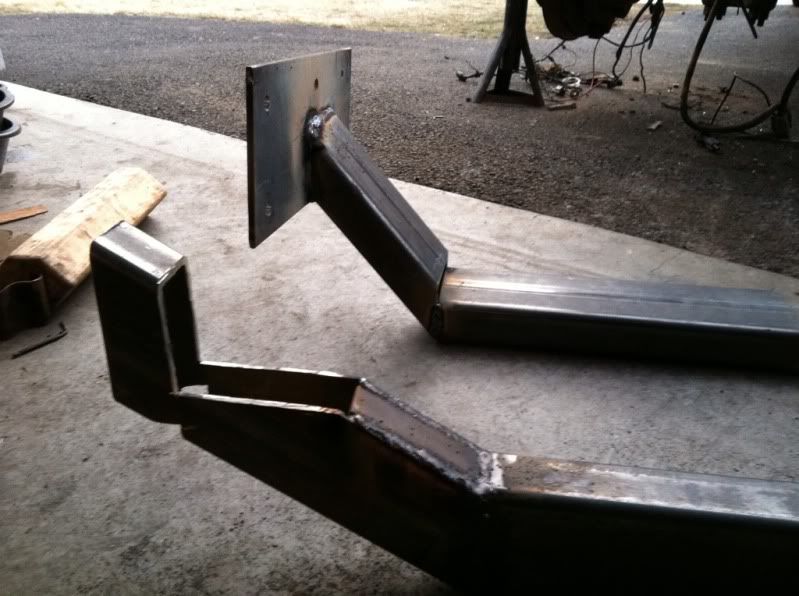
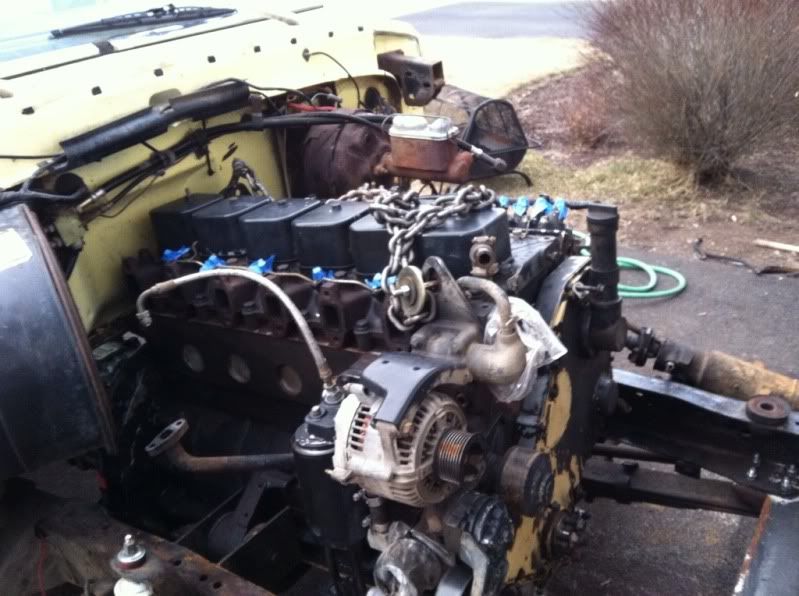
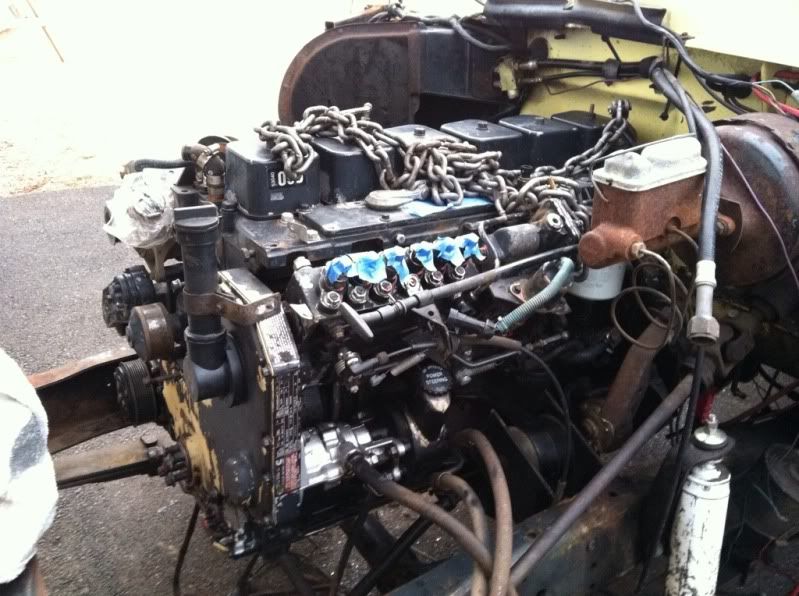
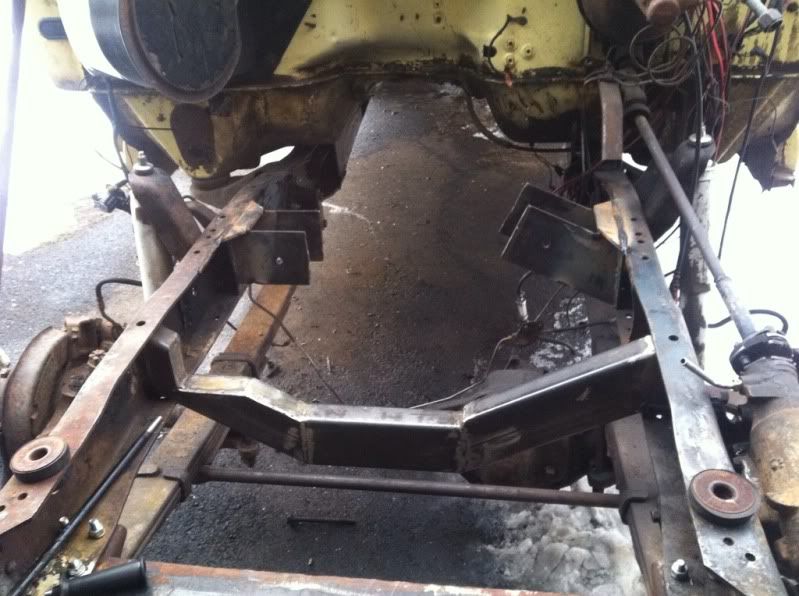
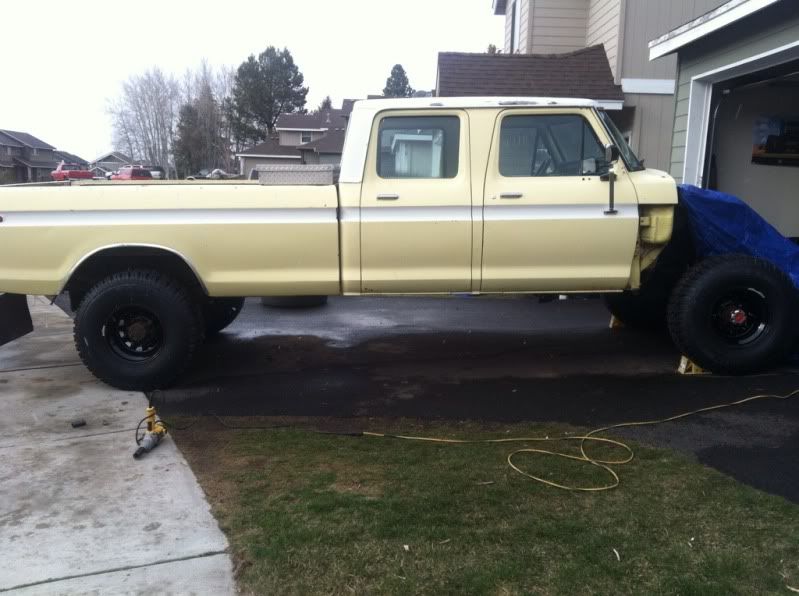
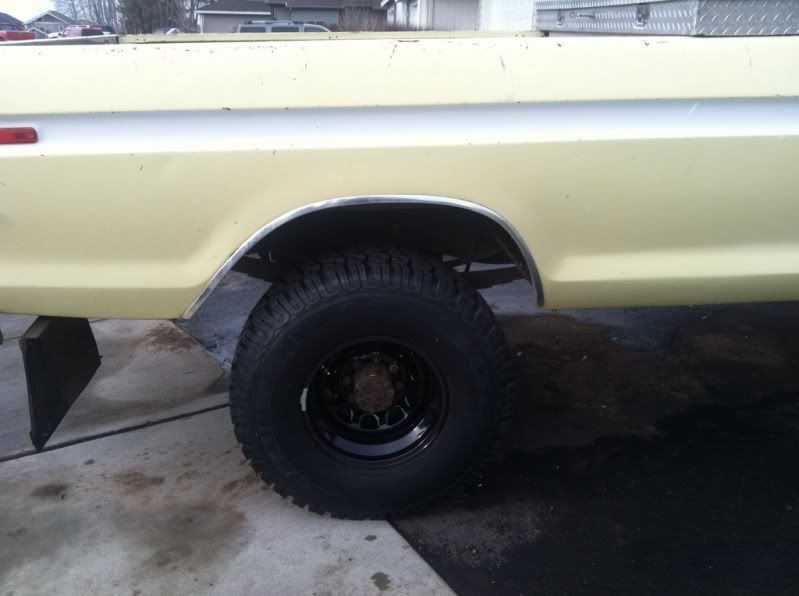
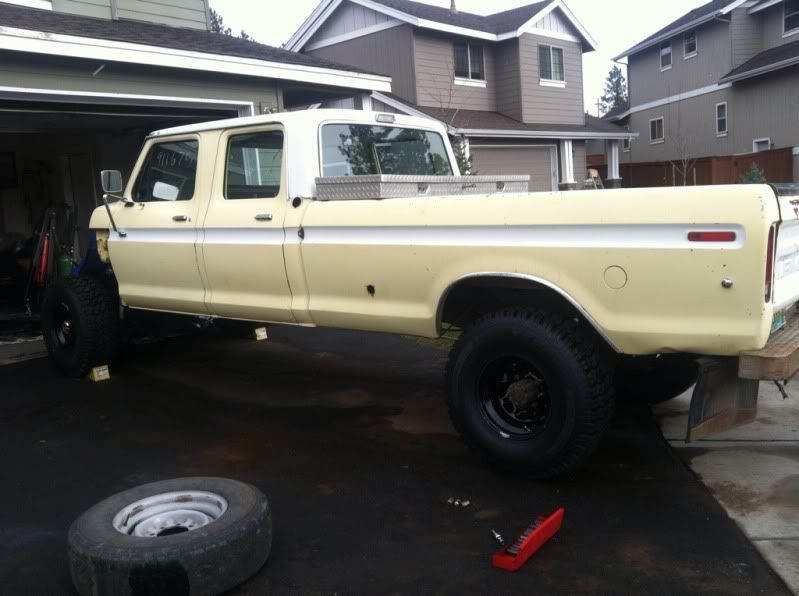
I bought the donor 2nd gen p-pumped 12v cummins in the beginning of January. It has 150xxx on it with a fresh pump. I got a brand new nv4500 5speed tranny, married transfercase from the truck the motor came out of (blew a tranny), Valair clutch good for a 500hp and 1000ft lb of torque, and an intercooler from a 2000 7.3 powerstroke. Then i bought the truck towards the middle of January. It is a special order F350 Crew Cab long bed with factory ac. These trucks only came in a crew cab longbed 2wd and crew cab short bed 4wd. I found this one that had already been converted to 4x4 with hi-boy front suspension, a dana 44 with big knuckles and big discs, and all stock 4wd steering. It was quite a score. From here i have torn out all of the stock drive train; a fresh 390, 4 speed manual, and a divorced np205 transfer case. I built a custom tranny crossmember and engine crossmember out of 2x4x.25 steel. All of the fab work was done with an old school Lincoln arc welder with 6011 rod. This makes for EXTREMELY strong welds, but not pretty ones. The motor mounts are also made with .25" steel. Here are some pics of the progress:

Image


Image


Image


Image


Image


Image


Image


Image

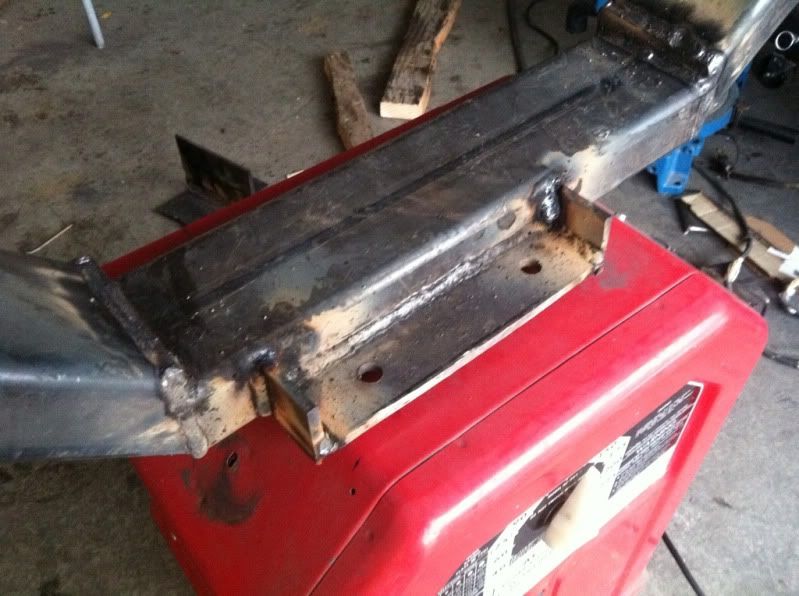
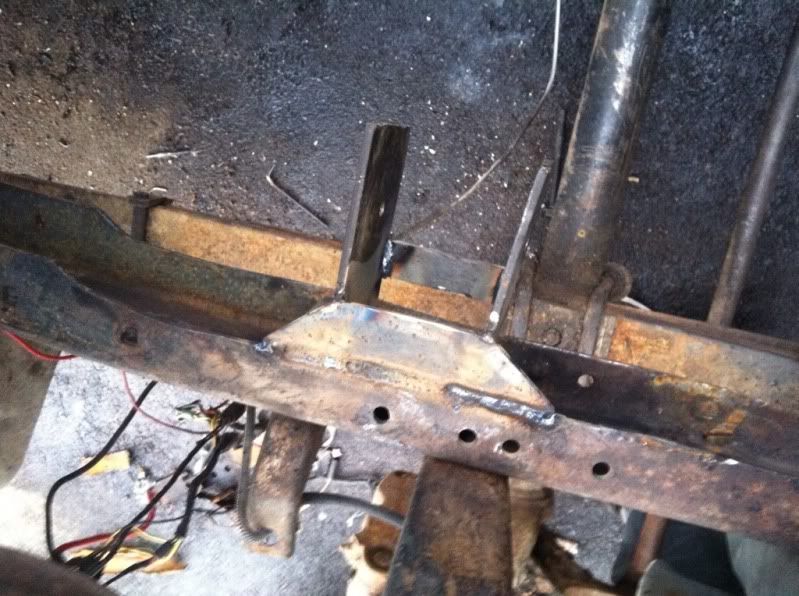
Front clip off and stock front crossmember rough cut out.
Image


Image


Image


Image


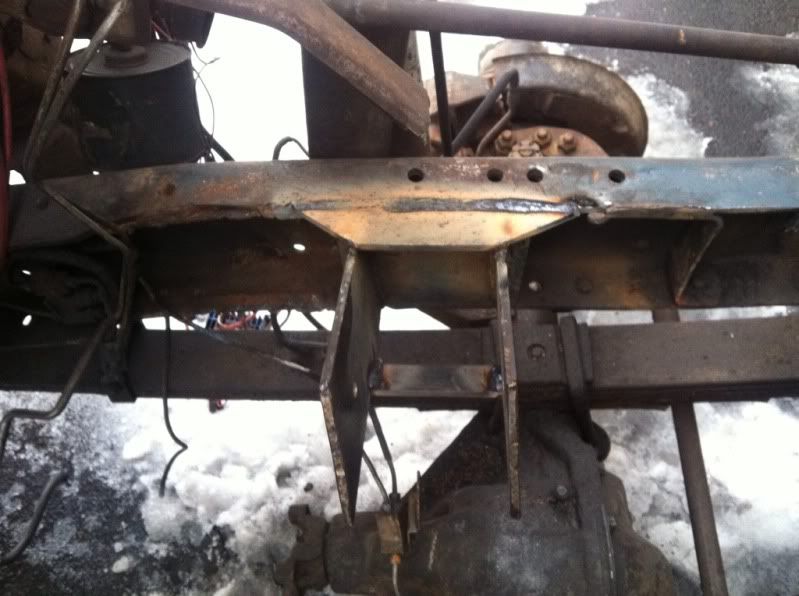
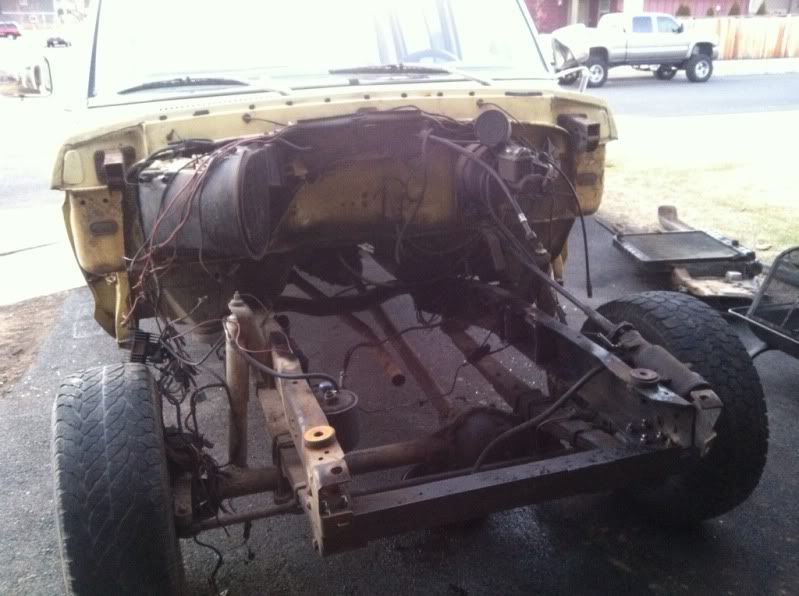
Everything is getting ground smooth right now and ready for paint. Should be able to do that this weekend. The engine crossmember and engine mounts are welded into the frame. I didnt see a point in making them bolt in. For the tranny crossmember i welded 18" plates .25" thick into the frame and then put 14" plates .25" thick on the crossmember that bolt up to it. The point of this is to stiffen the mid section of the frame to prevent side to side roll.

I will be turning the pump timing up to 17*, building a custom "boost controller" to run 35psi, #100 fuel plate, 3200gsk, and afc mods. I should be able to get close to 450hp and maybe 800-900ft lb of torque with the stock turbo. Once i can afford it i will be going to twin turbos, 5x .014 injectors, headstuds, and 60# valve springs for making well over 500hp and 1000ftlb's. Im hoping to have this thing on the road in the next 2-3 months, but we shall see.

Im sure i have left a lot out, but there will be more to come soon! Engine should be mounted with in the next 2 weeks. Just waiting on the flywheel mods for the new clutch. I hope you guys enjoy!

-Jon
 
#2 ·
And here are some more pics and stuff that the site wouldnt let me do all in one post:

Image


Image


Image

Passenger side notch out of engine crossmember is for the ac pump
Image

Sitting on the mounts without a cherry picker!
Image


Image


These next shots are of the fabrication right after it was done. They have since been all cleaned up and look nice. Dont be fooled by the deep digging of the rod and the massive amounts of slag; these are good welds and very strong ones.

This is where the tranny mount bolts on.
Image


Image


Image


Image
 
#3 ·
Sweet Truck! that will be one to be proud of when it is all done! Keep us updated on the project.
 
#4 ·
^ I came hear to say the exact same thing. I have always had a soft spot for this body style, it's going to be awesome once it's complete.
 
#6 ·
Thanks for the kind words guys! It will just have the interior done and the drive train all done for now. I cant afford to paint it yet, but im sure it will still look good. Hoping to have it driving in 2 months.
 
#7 ·
just FYI those welds would probably look better and be stronger still if after you cleaned them you put a cover pass on them with some 7018 and weld the cover passes in position... (flat welds) this will fill up the "digging" and give you more material at the weld joints, making them stronger welds... (kindof what i do for a living)
 
#9 ·
They are definitely cleaned up. Ive done that in the past. I may grab some 7018 and go over them again, but im pretty happy with how they are right now. They did grind down quite nicely. Thank you for the tip though! Do you think strength will be an issue just leaving them welded with the 6011?

-Jon
 
#10 ·
7018 has a higher a tensile strength and might be good insurance. I don't like 7018 because I have a real hard time getting the proper amperage to put down good clean welds. I prefer 6013 for it's ease of use. 6011 is more for unprepared, rusty or dirty metal.
Dave
 
#11 ·
Lonno, i know what you mean about the 7018. I went over my tranny mounts in the frame with it and it was a pain. But it came out nice and will work well.

I dont have much to update cuz ive been in Mexico for the past week. Work on the truck will start up fast again. The goal is to have this thing fully road worthy by May 19th. Hopefully it will happen! While i was gone my timing tool kit from Snap On, 3k GSK kit, and wheels and tires came in. Im hoping to have the core support and fenders fully bolted on and my intercooler mounted so i can order my piping for the downpipe and intercooler piping. The drivelines will be sent off to Newhouse in Redmond this week. Heres a few pics of the new wheels and tires. The 35's fit perfect on it. The only issue may be the steering arm off of the powersteering box. Do they make a custom arm for running bigger tires, or will i need to build one?

Image


Image


Image


Image
 
#12 ·
Just a little update. Today i got my timing set to 17*, tabbed KDP, sealed front cover, and then engine all buttoned up. I will have the front end back on next weekend for intercooler fitting and to start running the coolant and boost pipes. I had to order an exhaust manifold from a 2003-2007 common rail for its turbo placement. The stock manifold wouldn't work either way you put it on with the factory AC box. Does anyone know what complications i will run into with the common rail manifold?

-Jon
 
#14 ·
#15 ·
I have done this manifold swap on my dads 12v. Take the exhaust gasket for the 12v and put on the new manifold use a scribe to get the out line of the inside of the square ports onto the manifold. Then die grind the round hole out to meet the scribed mark on the manifolds. It will end up slightly funnel shaped but you will find you get a slightly faster spool due to the more restricted manifold of the 24v variants. Plus the are just sexy.
 
#17 ·
Obviously the boost tubes will be different. I'd check for clearance with the wastegate actuator as well.

I'd also recommend leaving the motor alone modification wise until its in the truck and running. Trying to do many mods at once while the motor isn't running is asking for trouble. I'd suggest running it stock for a week or two until you get all the bugs worked out then put the gsk in and whatever other mods you want.

And jmo but I doubt you'll see 450rwhp with a wh1c or hx35. Maybe 350rwhp with some pretty hot egts. You'll need something a little bigger for that kind of power. A he351cw can get you to or very close to 450rwhp if you add some fuel. But it'll have a lot of drive pressure with a 9cm exhaust housing.

The common rail manifold makes for a sexy looking set of twins IMO since the big turbo is on top in plain view instead of hidden down below. It'll look real nice with a clean painted up motor. My biggest regret for my swap is not painting the motor.

Sent from my Droid using Tapatalk 2
 
#18 ·
Im not worried about boost tubes because they have to be custom made anyways. The wastegate actuator should have plenty of room.

For now i will be doing a #10 fuel plate, boost elbow, timing at 17*, 3kgsk, rack plug, and AFC adjustments. Im going to go ahead and install everything in the motor right now because i have heard it run. Once its running i will start tuning it. I realize my hp goals were lofty for the stock turbo. For now i am just going to run those mods until i go to twins. Once i get the money saved up i am going to do head studs, 60# valve springs, 5x.014 injectors, new headgasket, mild port polishing, and an ht3b turbo on top of the wh1c. It will make plenty of power to tow anything with just the stock mods.

I painted my motor Ford Blue to make it look as factory as possible. The valve covers will be stock and polished. I will post up pics soon of what the engine bay is looking like.

I will have the intercooler mounted this weekend so that i can make templates for the ic piping, intake, downpipe, and lower coolant pipe. Then i can make a big order with Columbia River Mandrel Bending. Hopefully i can hear this thing run in about a month.

Thanks for the input! :)

-Jon
 
#19 ·
51dieselc4,
Did you have any problems with the bolt holes not lining up? It looks like I will have to oblong two of the ports mounting holes to get the bolts to line up. Shouldnt be a problem though.
 
#20 ·
I got my new exhaust manifold in the mail and went to test fit it and it is a tad bit not straight. Do you guys think i should have it milled down or just try to bring it in flat? I was thinking about just tightening it down flat and heating it up with the torch to get it to settle in, but i dont know about that. What do you guys think?

-Jon
 
#23 ·
In your 10th build pic, how many degrees is your engine tilted. Thanks
 
#25 ·
It is tilted 5* back.

my96z,
Thanks for that part number! Im just going to stick with the common rail mani cuz it only cost me 90$ and all i need to do is a little trimming on the gaskets. If all said and done it doesnt work i will get the Ford type.
 
#26 ·
Well i got the Common Rail mani mounted up this weekend. I just took the gasket and marked where i needed to take material off and took my die grinder to it. Everything worked out quite nicely. Here are a few pics. I forgot to take some before i put it on of the porting:

Image


Image


Now i did have some troubles with the wastegate actuator. It is hitting the block. I guess theres a turbo that has it mounted 90* from where mine is, i dont know. Or you can remount it 90*... I dont see how to do this, but maybe you guys know? Here are some pics of how it mounts now:

Image


Image


-Jon
 
#27 ·
a wh1c off a Ford medium duty cummins will have the wastegate actuator mounted differently. If I remember right it points toward the front of the truck. But the little wastegate tab itself was attached at a different angle too. That's what was on my motor and I sold it and used a Dodge manifold and turbo since it fit better for my application.

Sent from my Droid using Tapatalk 2
 
#28 ·
Ya, i found an exhaust housing wastegate for it. Goldfarb and Associates is my number one place to buy turbo stuff. I called them up and they have everything i need. They even sell whole core turbos for $150 dollars. Great place to do business.

Right now i need to get my intercooler piping and downpipe made. My engine did not come with an exhaust elbow that goes to the turbo so i am trying to figure out how to go from the 3" v-band to a 4" downpipe. Maybe someone has an exhaust elbow they'll sell or a link to a 4"-3" reducer? Im going to try to go to the exhaust shop this week to have them bend a tube for me for my lower coolant hose. From there the only thing really left to do is wire it up. Does anyone have any engine wiring diagrams? The main thing i need is for wiring in relays for the push and pull on the full shut off solenoid. Im hoping to be able to start in the next month or so. We'll see how things go

-Jon
 
#32 ·
Right now i need to get my intercooler piping and downpipe made. My engine did not come with an exhaust elbow that goes to the turbo so i am trying to figure out how to go from the 3" v-band to a 4" downpipe. Maybe someone has an exhaust elbow they'll sell or a link to a 4"-3" reducer? -Jon
Jon-- Here are a couple of options for the reducer fitting:

http://sourceautomotive.biz/3to4exhaustflange.aspx

http://www.atpturbo.com/mm5/merchant.mvc?Screen=PROD&Product_Code=ATP-FLS-043&Category_Code=FLS

If there is no room for these and a tight-radius 90° elbow, then you could consider going with 3" OD off the turbo and increase to 4" immediately downstream of the 3" elbow with a reducer like this:

http://store.airflo.com/4315-340-3.html
The slip connections make it easier to fit up and tack than butt welded connections next to the firewall.

Best,

Chuck