Cummins 4BT & Diesel Conversions Forums banner

85 Chevy K20 6bt swap (work in progress)

153K views 169 replies 47 participants last post by  tlspeed1  
#1 ·
hello all, early this summer i aquired a wrecked 1990 w250 non i/c ctd getrag 205 truck with the intentions of a cummins powered chevy. in july while working on the road,(construction) i came across a pair of old 4x4 chevy pickups sitting in a guys yard that looked as if they had been neglected for some time. one was a rotted out 78 1ton and the other a salvagable 85 3/4 ton with the fancy 89 grille and headlamps.
Image

after knocking on the guys door i decided the price was right and found a way to get these bad boys home 250 miles away.
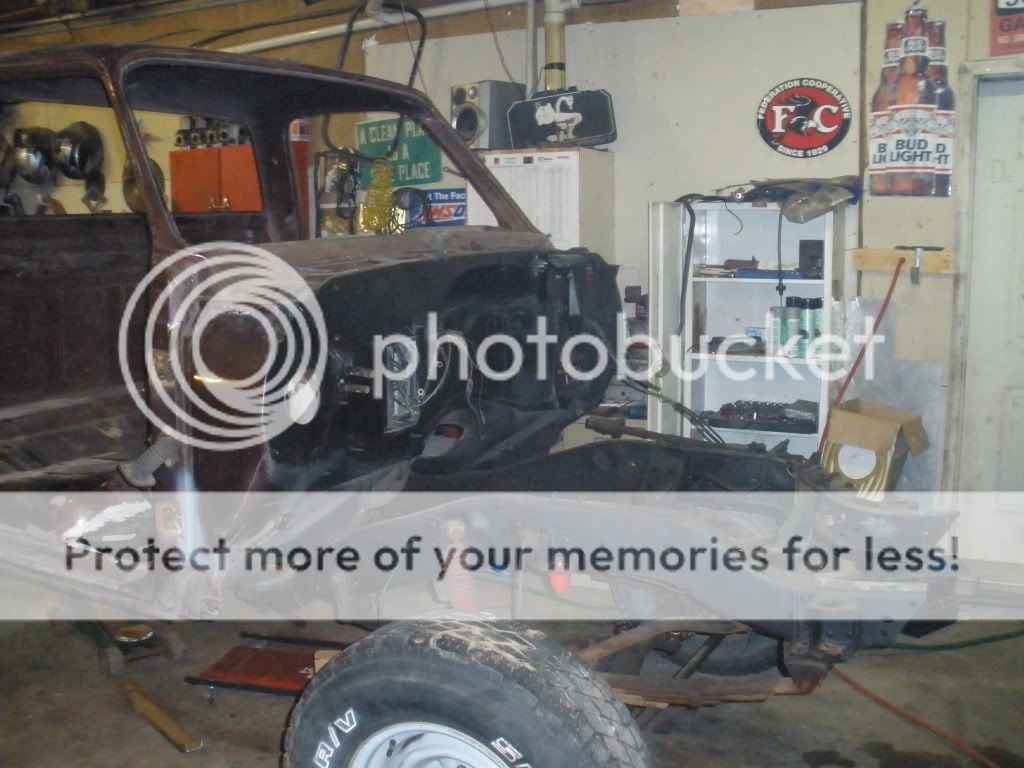
got them home and started tearing into the 85. I stripped it down to the bare frame and running gear, and got the frame cleaned up and undercoated. after further reveiw, i decided the cab floor was too far gone to fix. i got on craigslist and scored a better 82 cab for a decent price that needed just a pass side floor pan opposed to the entire floor. after the underside of the cab was prepped and undercoated on the frame it went.
Image

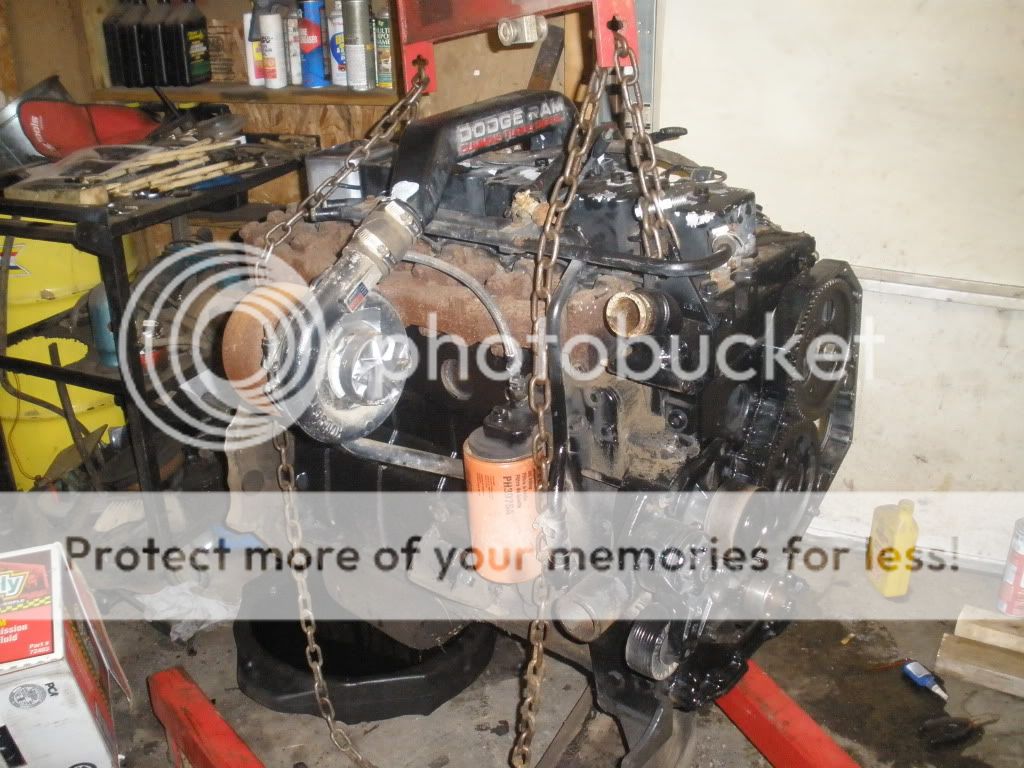
got the cummins pulled from the donor and noticed a hole in the timing case beside the vac/ ps pump. turned out the vacuum pump bearing shelled and dropped the gear into the cam and injection gears. i replace the timing housing, cam and injection gears, oil pump (scored badly from debris) and got a new p-30 style pump setup thanks to jakey on here for sourcing the parts.
Image

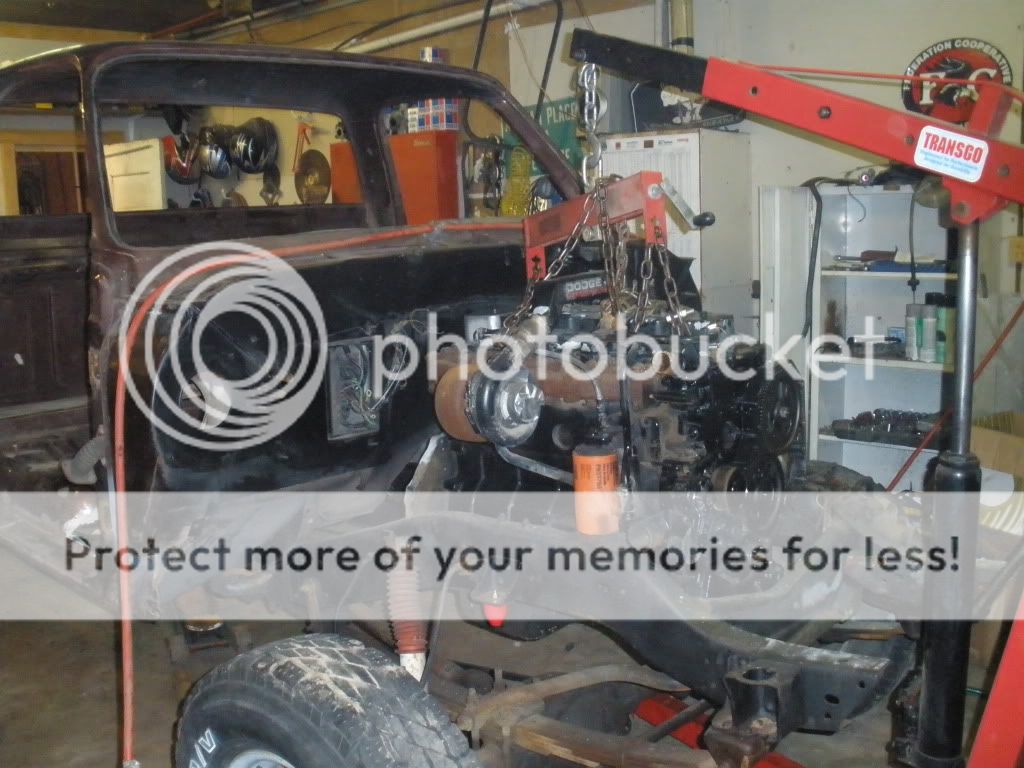
after getting it all buttoned back up in she went using the mopar 1st gen mounts i modified.
Image

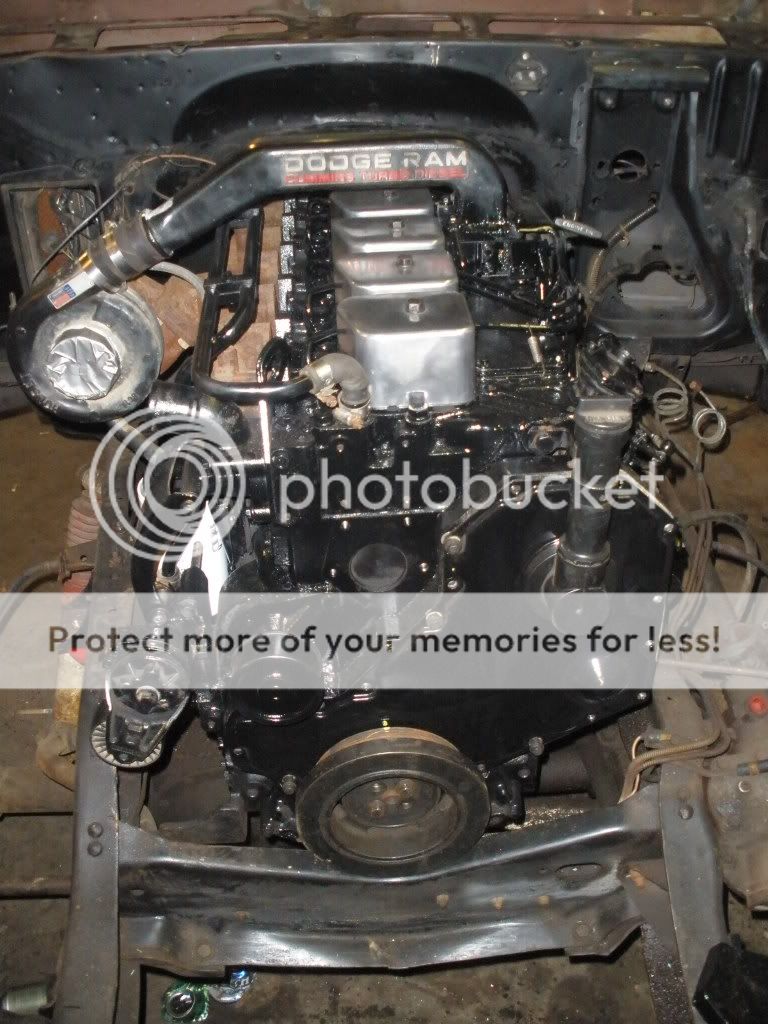
heres as it sits right now, ill be updating this thread as i go
Image
 
#34 ·
purge welding is done in the food industry to keep welds smooth inside the pipe.so the product doesnt stick to it, making it rot inside pipe when the pipeline is empty. you simply seal the highest end of the peice with tape, poke a small hole in it and fill the tube with argon regulated at 15-20 psi. you can see the hose taped in the bottom of the pipe in the pic. let it purge all the o2 out for a few minutes and burn it together.
 
#35 ·
If you try to weld stainless steel pipe with out a argon purge there will be black looking bird sh** on the inside. when i took my 6G SS pipe test, i did one with a purge and one with out, the one with out looked so bad on the inside that i did not want to turn in, it passed but i just didnt like that it wasnt pretty.
 
#36 ·
wicked,
I am gathering parts to do about the same swap, but using a crew cab. The radiator you are using is it the stock heavy duty Chevy radiator?
I like the way you placed the intercooler I was curios how I was gonna get that monster between the headlights without to much fab work I will be borrowing that idea. Keep up the good work.
Bob
 
#37 · (Edited)
thanks for the kind words, the radiator is not the hd unit, in fact the opposite. i found a stock 2 core unit, as suggested in another thread by crewcab59 (our resident 6bt swapping guru)
no real progress to speak of, new clutch, getrag and 205 are back in, im trying to find a way to sneak my 4in. exhaust past the t case. the pipe is so tight its hitting both the floorboard and the 205. my tranny mount must be alot taller than most, i'll make it work some how. more pics on the way bounce
 
#38 ·
I like the intercooler fitment, but I am curious about plans to actually make it support the front sheet metal again. Are you planning to rebuild it so it will hold up the front fenders?
 
#39 ·
i really havent decided what im going to do here yet, i might build stock-like bracing wider apart, between the headlamps on each side. it is still super rigid without the uprights, and may stay just like it is. i plan on replacing the support, its got some cancer around the mounting holes on the bottom. i want to have this thing rust free, with a decent paint job. i dont want to take it apart again in 2 or 3 yrs. especially here in wisconsin with all the road salt.
 
#40 ·
Update!

hey fellas, havent given an update for a while so here goes.
i got a new core support since the original was a bit cancerous. the down side is i got a cheap tiawan made certifit one that is way more flimsy then the gm, but for $65 im not complaining. so i figured i better rebuild some type of bracing to hold the front sheet metal in place, like turbos10 suggested. heres what i came up with. i kept it in the same place as the original uprights, because it seemed if i moved them outward they wouldnt be as effective.

Image


Image


i also got my exhaust system finished, all stainless 4in. to the back of the cab, and stepped up to 5in. aluminized from there back. im not a big fan of the huge 5in. pipe, but i scored a 10ft. stick for free at the parts store here in town. they couldnt sell it because it was dented.

i sandblasted my turbo exhaust housing and manifold, and liked the way they looked that shiny grey color. so i picked up some flat aluminum colored high temp paint from VHT. i had to use their special primer with it, and cure it in 3 different stages. they claim it will withstand 2000 deg. but i doubt that. we will see how long it lasts :confused: i also ported the manifold to match the head.
Image


Image
 
#41 ·
RE

Hey Finally found you on here, looks like the projects comin along real nice, im probably gonna start mine this spring, iv'e been kinda stealin all my good parts off my 96 dodge and throwin them on a 93 dodge i got witch i will then tear all apart in the spring and transfer it over to the chev. Take er' easy Jason
 
#42 ·
Hey Finally found you on here, looks like the projects comin along real nice, im probably gonna start mine this spring, iv'e been kinda stealin all my good parts off my 96 dodge and throwin them on a 93 dodge i got witch i will then tear all apart in the spring and transfer it over to the chev. Take er' easy Jason
good to see you on here jason, hows the(early 70's chevy truck) duramax project coming along? you should start a build thread on that sweetheart here, id love to see how its coming together.
 
#43 ·
RE:

Its kinda been on a stand still for now, ran outta space in the garage so i had to ship it out to the pops warehouse, but i should be back in it probably this spring. I've been buying odd's and ends for it here and there. Going to be offing the 96 dodge cummins here shortly to direct more of my funding towards the cummins and duramax chevys, Keep the pictures coming!
 
#44 ·
Update!

i've been pretty busy the last couple of days getting the front clip together, and getting things buttoned up in the engine bay.heres where im at with that.
Image

Image

i got my engine crossmember done, took my time on this. 1.5X3 rectube notched, bent and welded. no butt welds here fellas.
Image

Image


here you can see how i tied the x-member back into the motor mounts.
Image
 
#49 ·
Wow, I am very impressed with the core support idea. I have been struggling with how to rebuild this support, but I now have a weekend project in front of me since I have no excuses any more. I have been wanting to rearrange mine so the flow is A/C,I/C,rad. You have shown it will work since you have the same i/c as me.

Thanks, and awesome buildup!!
 
#50 ·
thanks alot guys, i have put a ton of time into this thing, trying to take it slow and not rush anything, because thats how things end up cobbled and sloppy. the deadline for the truck is memorial day, it needs to have all the bugs worked out by then as it will be towing my wheeling rig 3hrs away for the season opener at dresser, wi. i will also need the shop space for a week or two to get the crawler ready to rock for the year.

I tackled most of the wiring last night, still need to swap axles and get my rear driveline figured out. also need to get cracking on the body and paint end of things.

Turbo- the small channel iron i used is pretty much just 3/4in. square tube ripped down the center. i have 1/4in. clearance between the braces and the I/C and a 1/4in between the rad. and I/C. by the way, your crew cab is badass!
 
#51 ·
Turbo- the small channel iron i used is pretty much just 3/4in. square tube ripped down the center. i have 1/4in. clearance between the braces and the I/C and a 1/4in between the rad. and I/C. by the way, your crew cab is badass!
Thanks for the tip. I was thinking I would use 1/4-1/2" square tube and just weld the entire piece in. I build my tilt hood frame on my pulling tractor completely from 1/4"(id) square tube and it is suprisingly strong when you triangulate it properly. I could rip the 3/4" down, but linear strenth is what you need in this application and the smaller tube will have the same effective side wall. I figure I can gussett with 1/8" plate for strength. My core support has a bunch of cracks in it as it is so it needs rebuilding. I think it was an aftermarket peice someone did at some point.
 
#54 ·
i ran new 3/8 fuel and 5/16 return lines down the driver side framerail, and only have one tank in it now just to get it running. i plan to put the other tank back in and mount the selector valve on the driver side. it should work just fine granted the selector still functions properly.
 
#59 ·
It helps to use the diesel oil pressure gauge and sender since it goes up to 80psi. The regular gas gauges only go to 60, and a cold Cummins will peg it.
 
#64 ·
GM 10SI alternator that originally came on my truck.
 
#66 ·
Update!

Been a while since i posted an update, been busy with the kids.

well, after some trial and error i got the wiring completed. everything works 4x4 indicator and the whole shmear. heres a pic from my wiring endeavors.
Image

i also got the mechanical linkage pedals to work with my hydro setup, and got the interior painted.
Image

Image

got started on the cab soundproofing as well.
Image
 
#69 ·
FREEBEE!! i picked up another donor yesterday. this would be 5 trucks total now that have been in and out of here to pillage parts off of.
got it stipped down and ready for the scrapyard today. hood, doors and glass were good. box was full of bondo :pissed: and i still dont have a decent one.i also pulled the 6" lift and all the interior trim and headliner (custom delux package) seatbelts ect..